Example of Cluster Creation, Rollback, and Expansion in Xpanel
Example of Cluster Creation, Rollback, and Expansion in Xpanel
1. Testing Requirements
- Have cluster_mgr and node_mgr created and ready, including prepared HDFS.
Process
- After creating cluster_mgr and node_mgr, log in using the metadata cluster and force password modification on first login.
- Prepare machines and specify which ones will be used as computing nodes and storage nodes for the cluster to be created.
- Create the cluster according to actual business needs.
- Perform a global backup of the cluster.
- Create a new cluster as a container and restore the backup data.
- Expand the cluster.
2. Login Account
- For the first login, the account and password are both "super_dba". Simply enter the IP and port of cluster_mgr to log in.
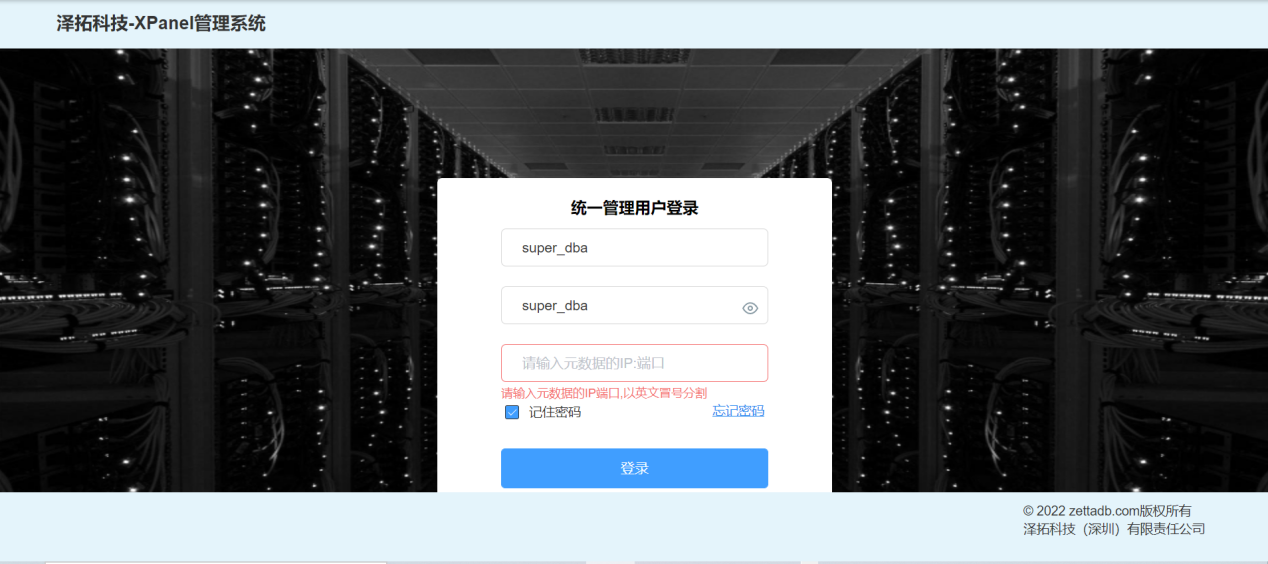
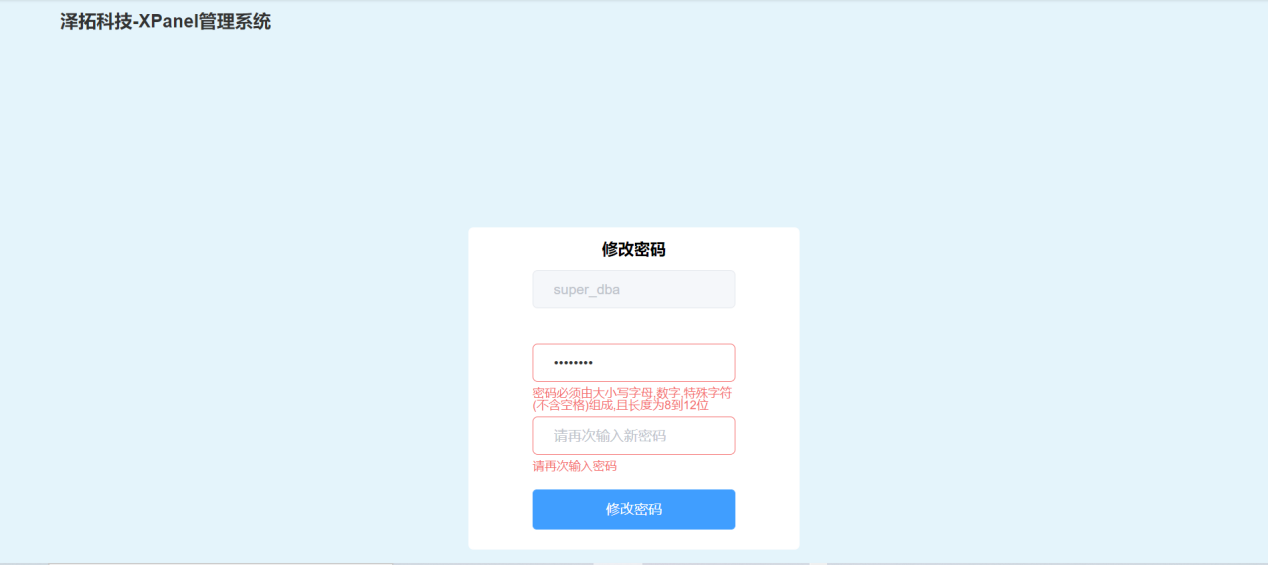
- After clicking "Login", a page will appear prompting for a password change. Only the first login after creating cluster_mgr requires a password change. (Password must consist of uppercase and lowercase letters, numbers, and special characters (excluding spaces), and be 8 to 12 characters in length.).
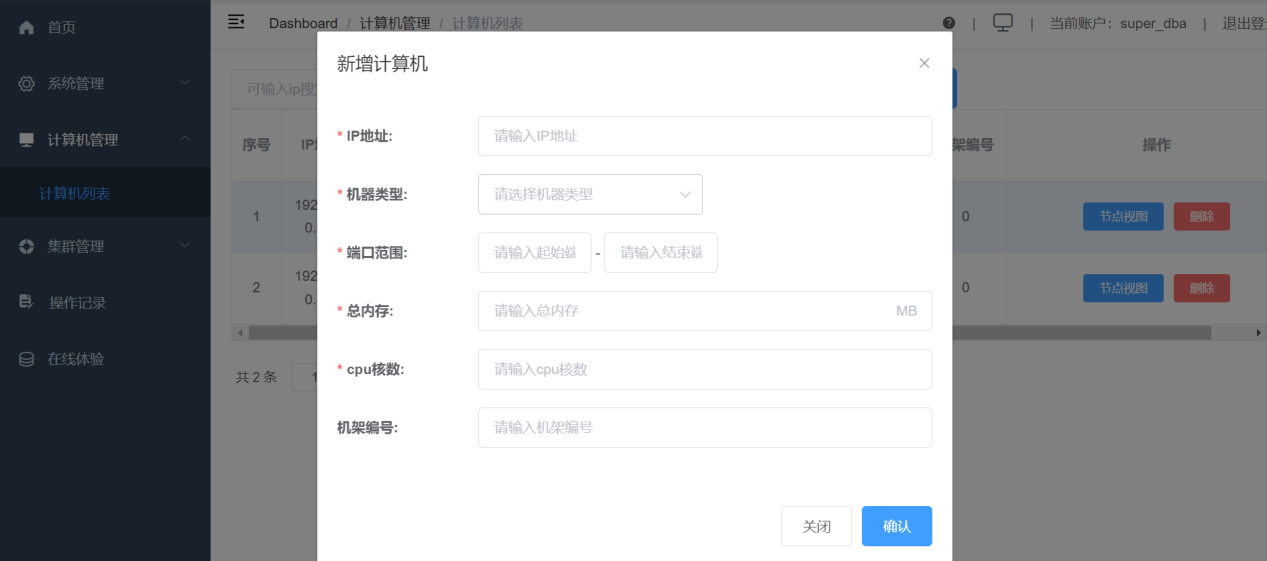
3. Adding New Types of Computing and Storage for Computers
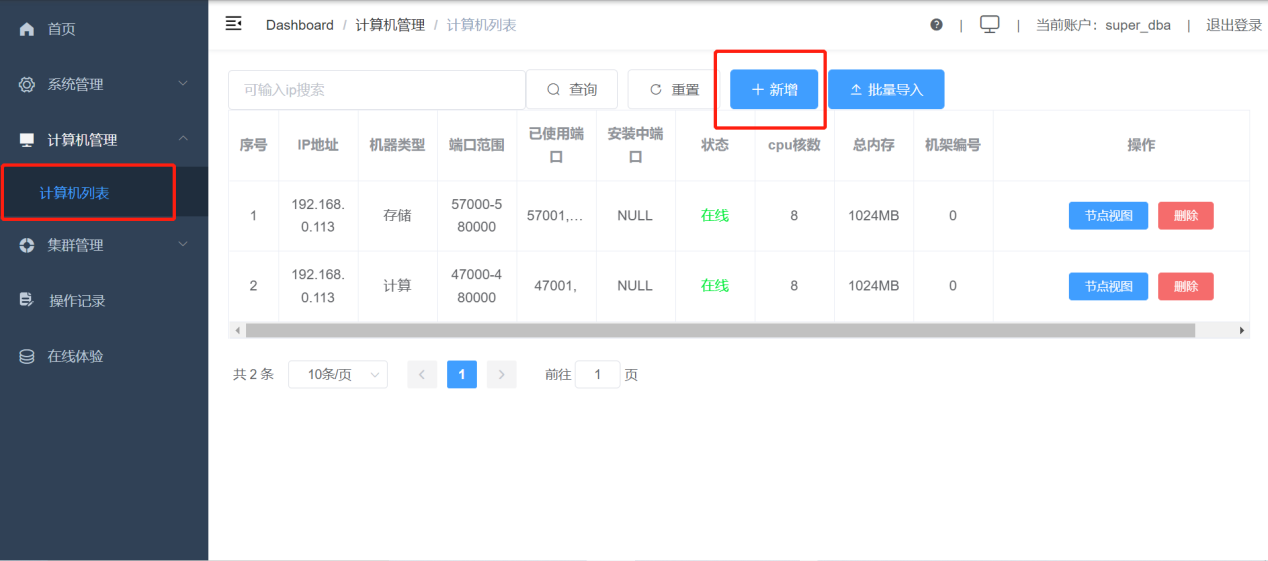
Fill in the information for the computers that need to be deployed. The "Machine Type" field should have two options: "Storage" and "Computing". When creating a cluster, the appropriate option should be selected.
Click on "Batch Import" to upload an xls/xlsx file, which should not exceed 5MB in size.
The file template is shown below and can be downloaded directly from "Batch Import".

4. Creating a Cluster
Go to "Cluster Management"-"Cluster List"-"Cluster List Information"-"New". 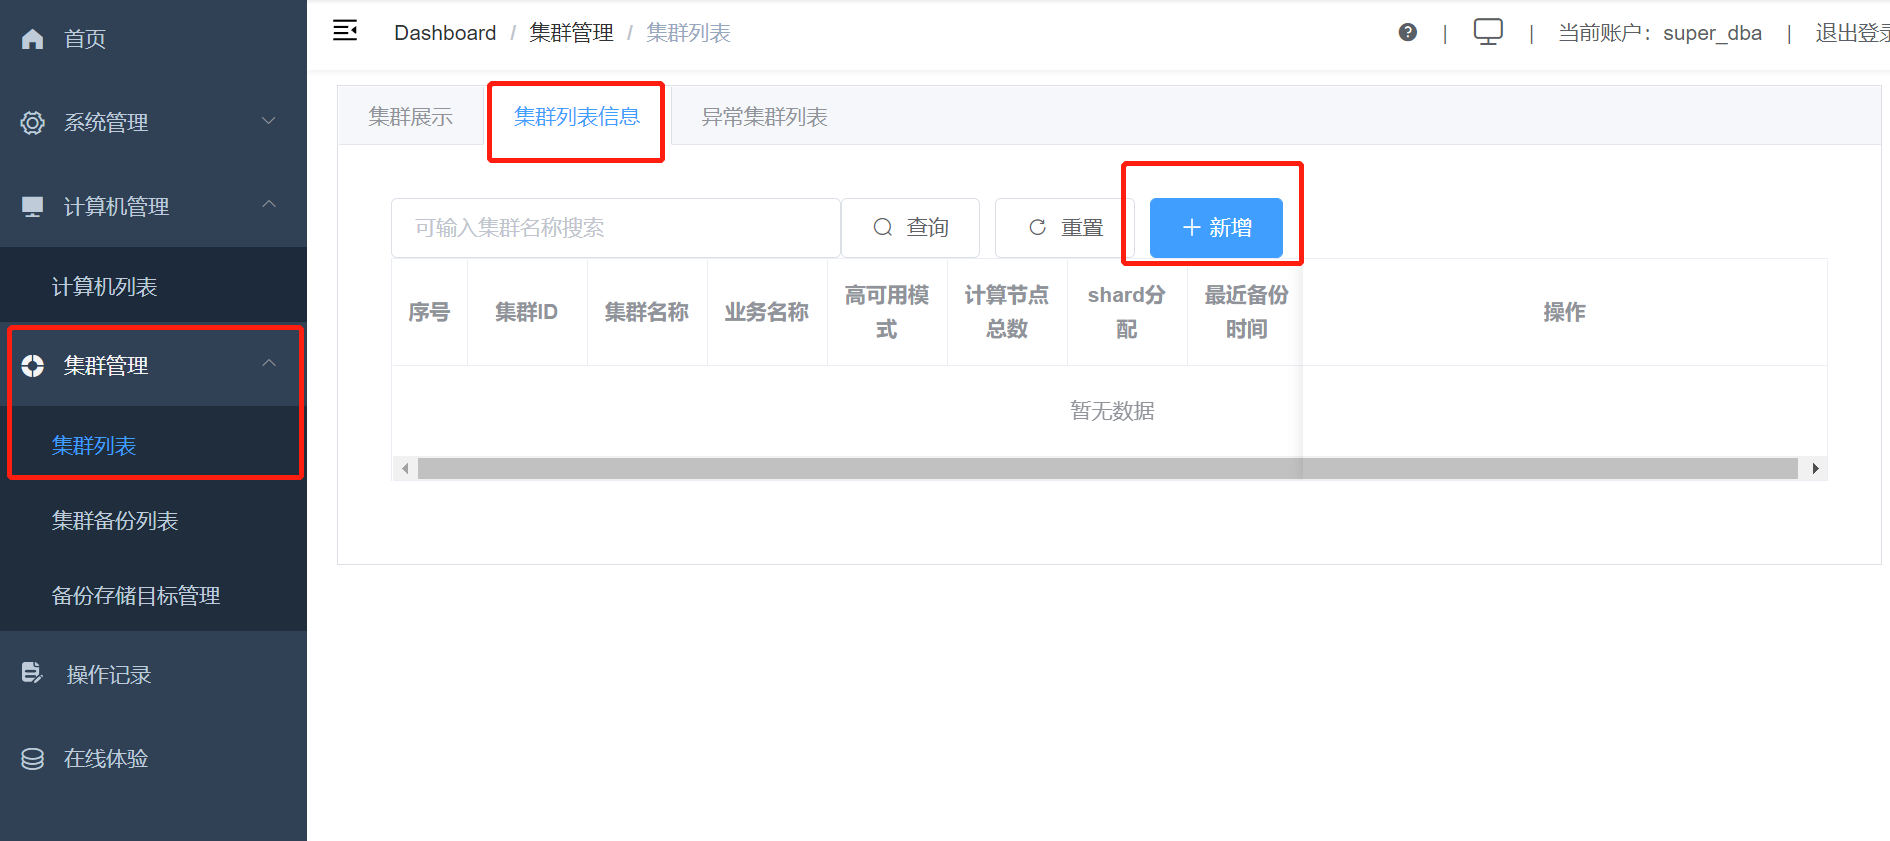
Create the cluster size based on the business needs. 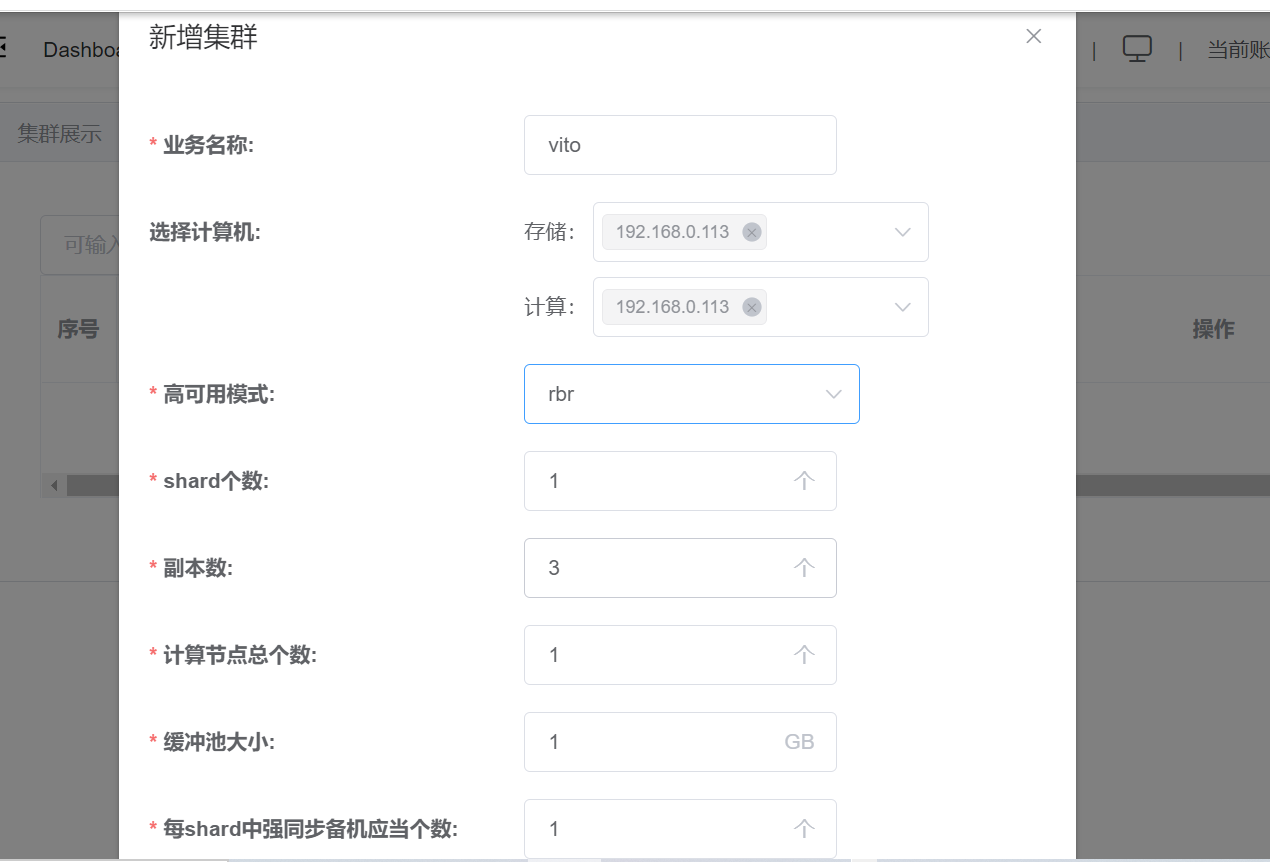
Finally, there will be a prompt saying that the creation was successful. 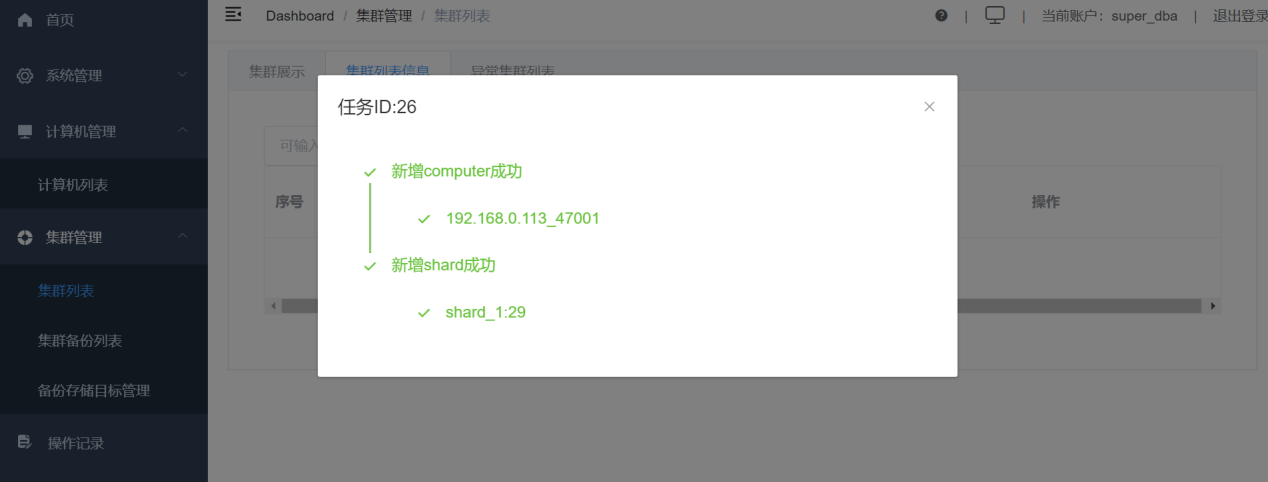
In "Cluster Display," you can clearly see a computing node and three storage nodes contained in the shard. Any additional computing nodes or shards will be displayed here. 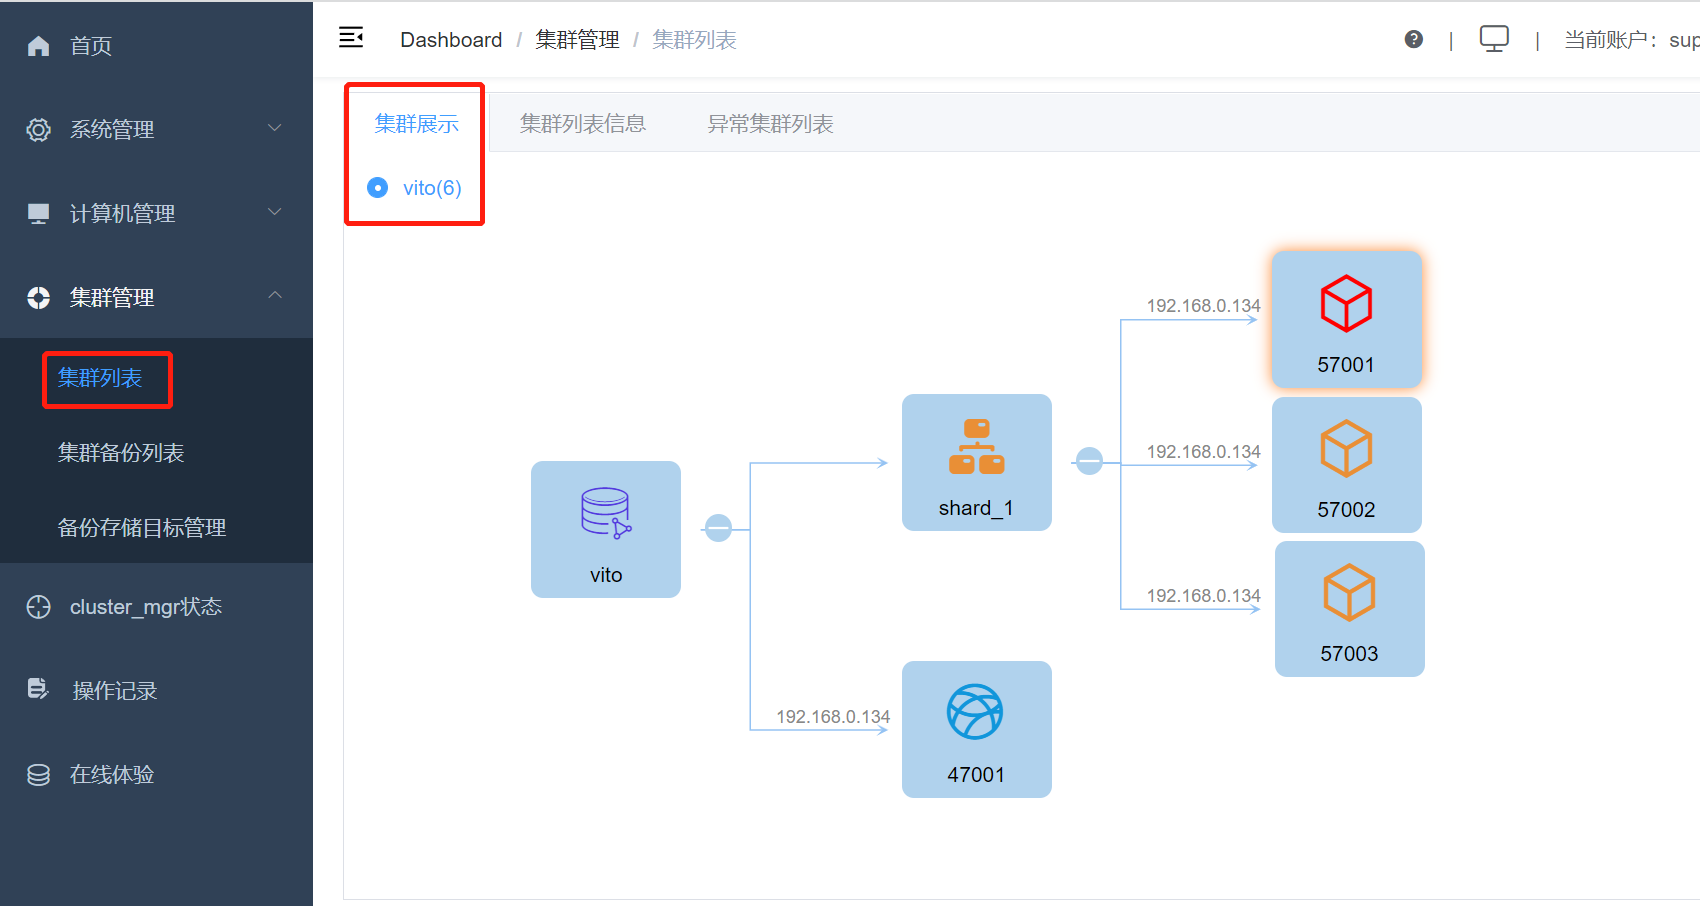
Validate and create a table on the computing node at 47001. 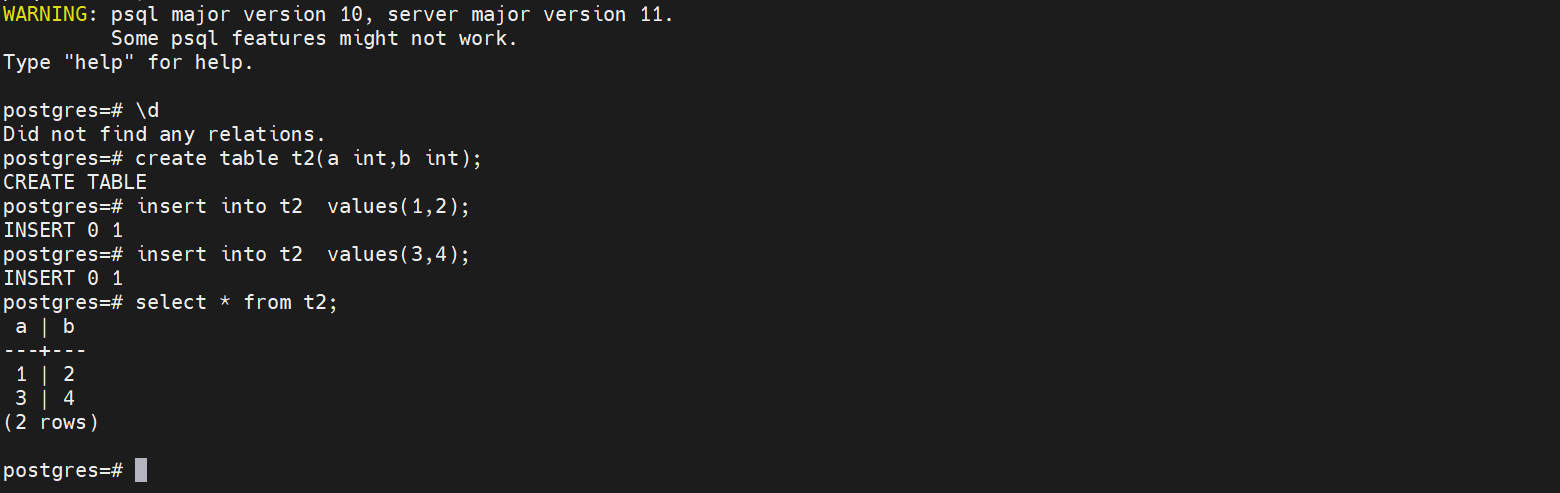
5. Global Backup
Perform a global backup for the created cluster. 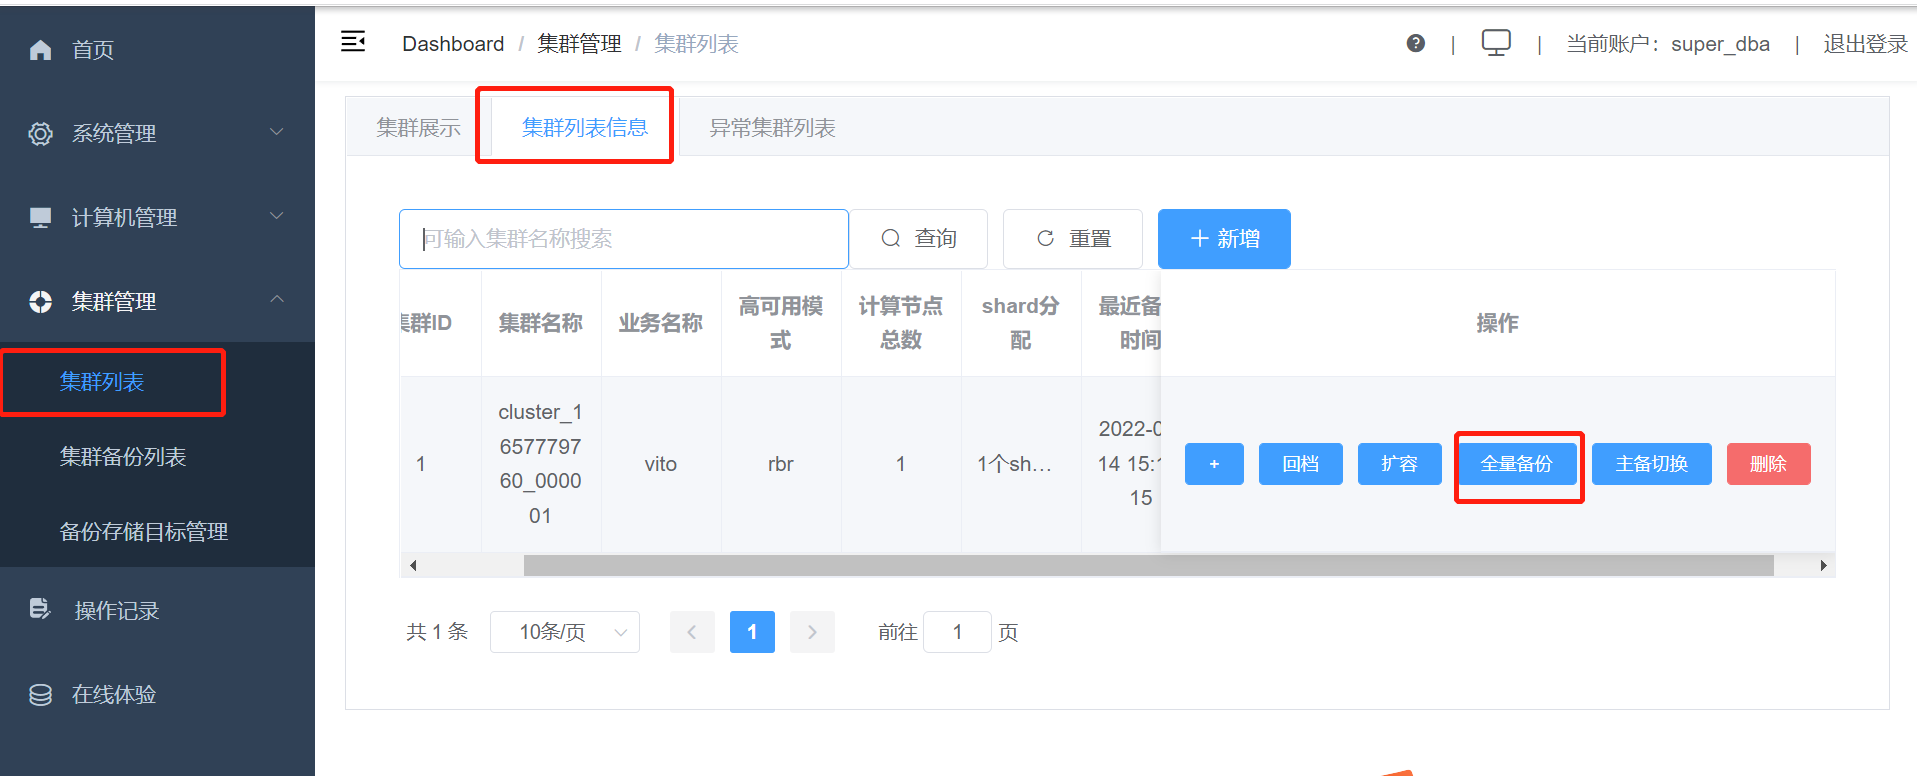
In the "Cluster Backup List," you can view the status of the cluster backup: done, and result information: success, indicating that it has been successful. 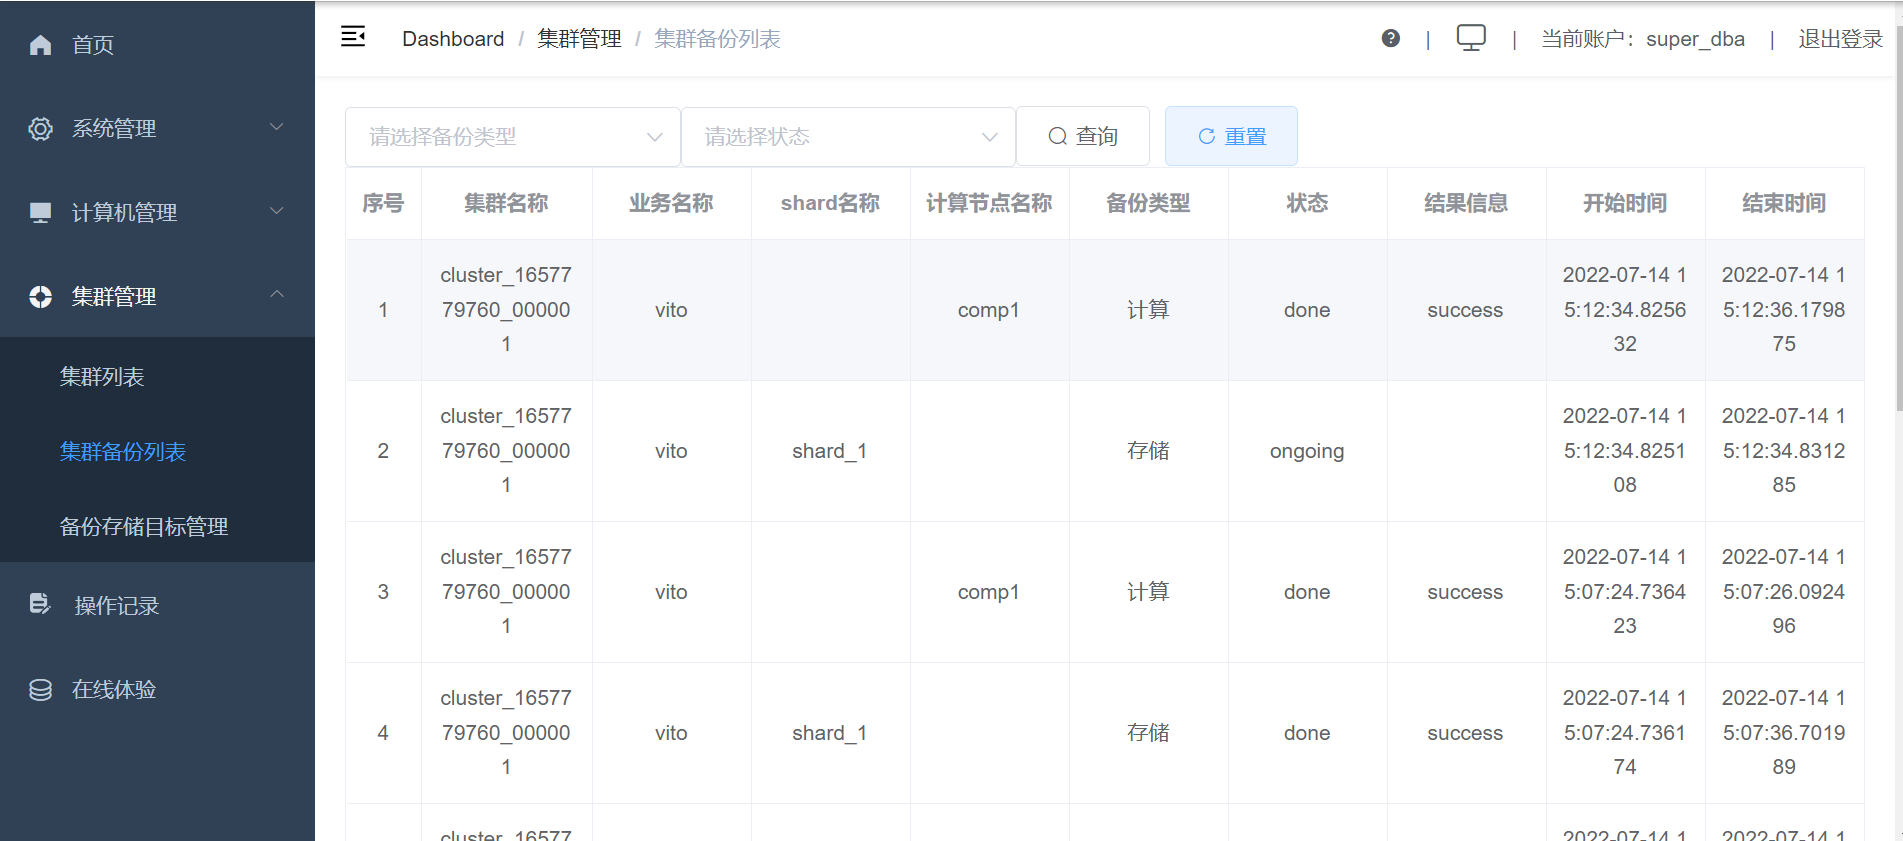
6. Cluster Rollback
Create a new cluster vito3 as the restore backup cluster. (The shards in the rollback cluster need to be equal, and the storage nodes inside can be unequal.)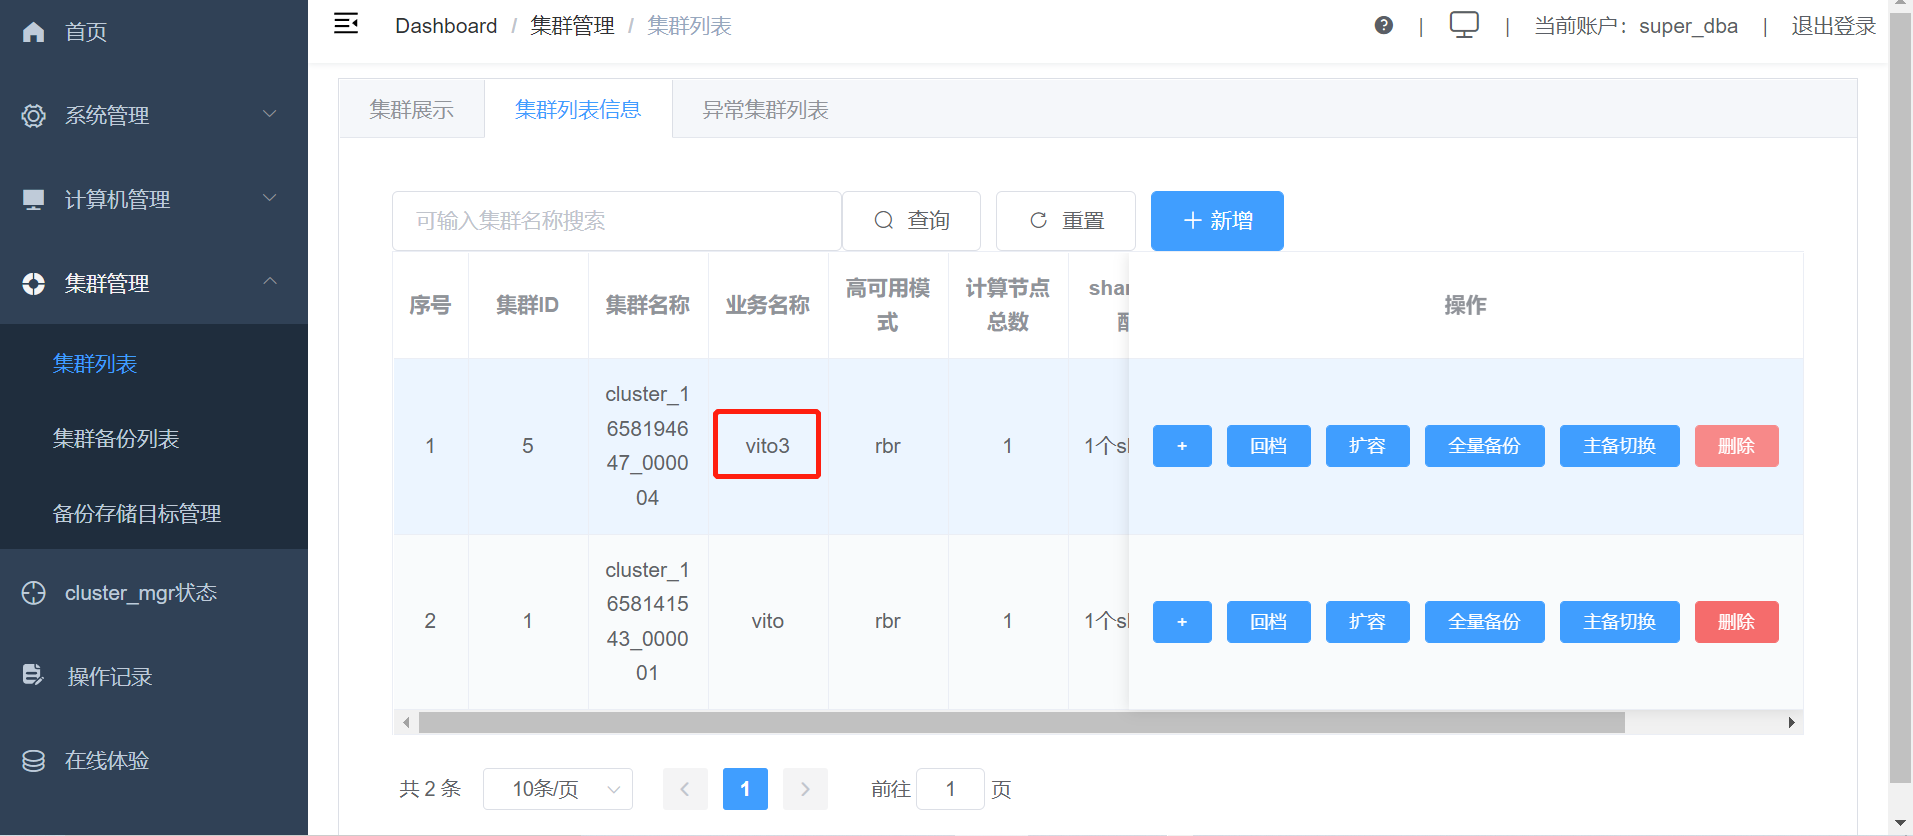
The cluster computing node of Vito3 is 47003. 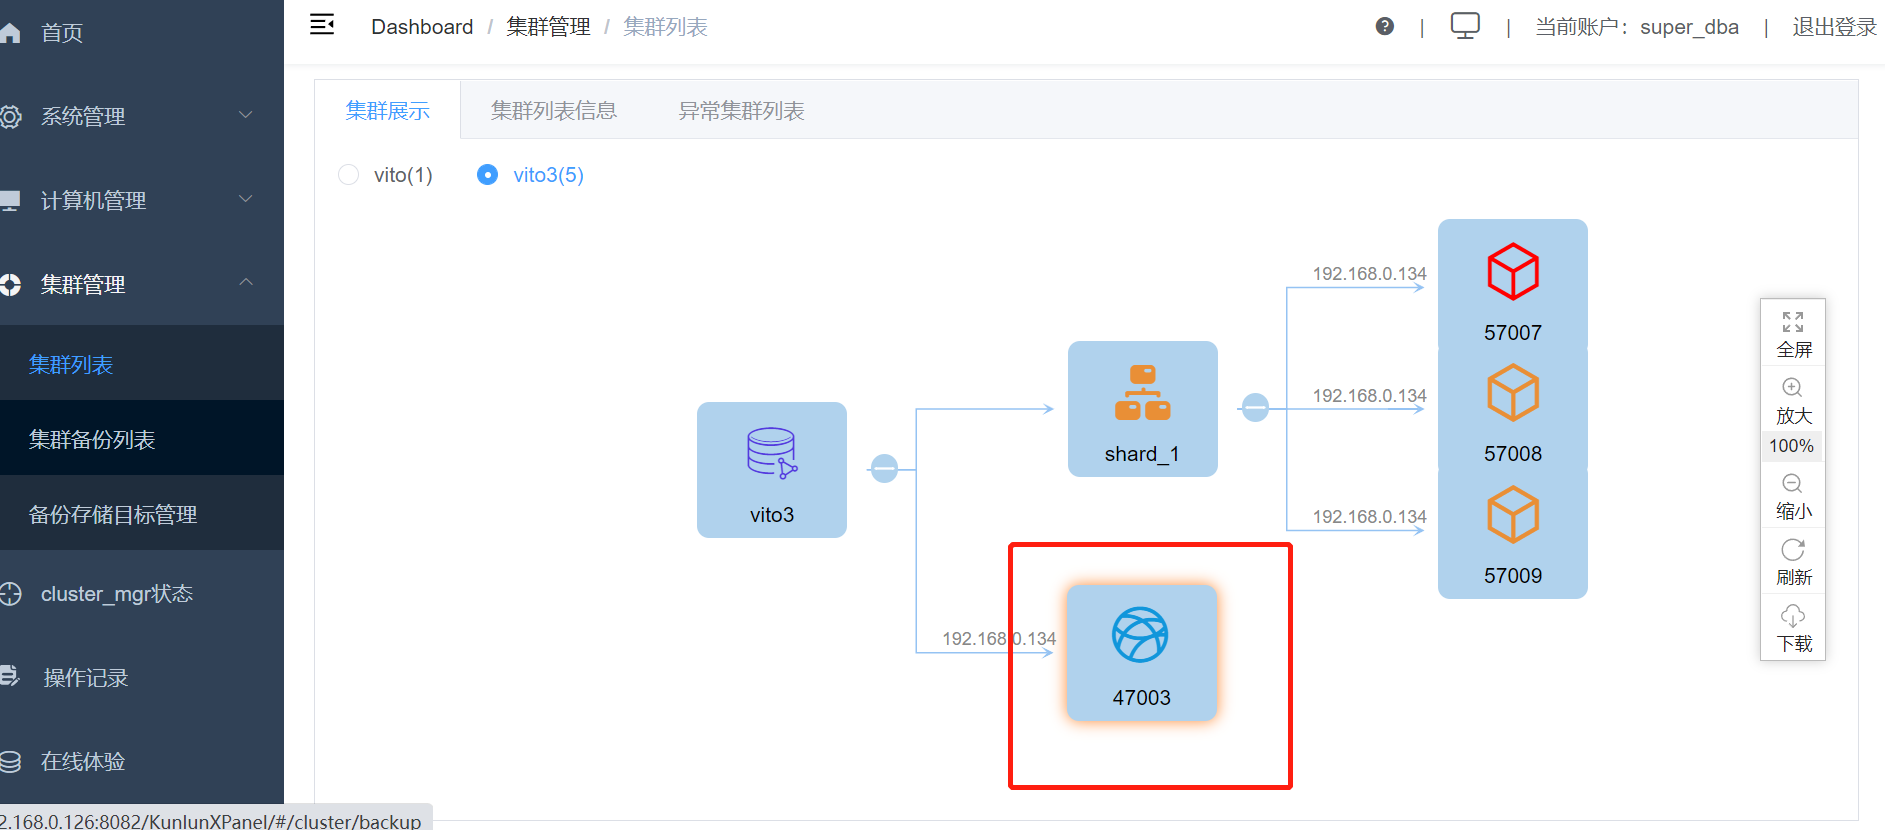
Logging in to the node, you can also see that there are no tables inside. 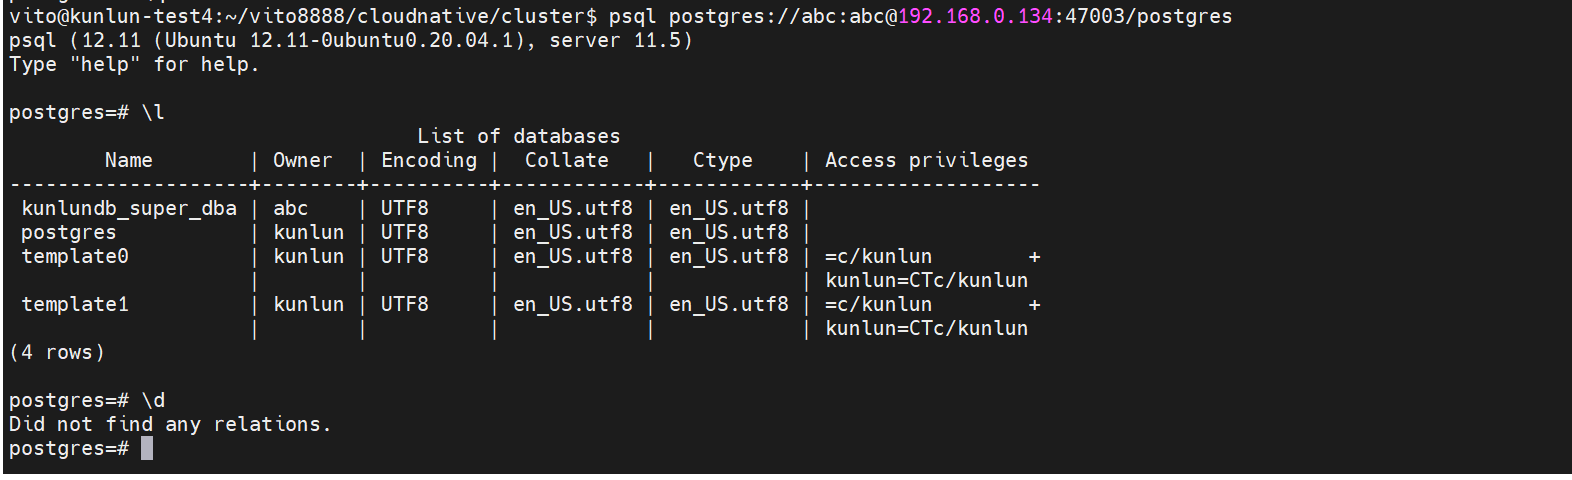
Restore the backup from the previous vito cluster to the vito3 cluster. 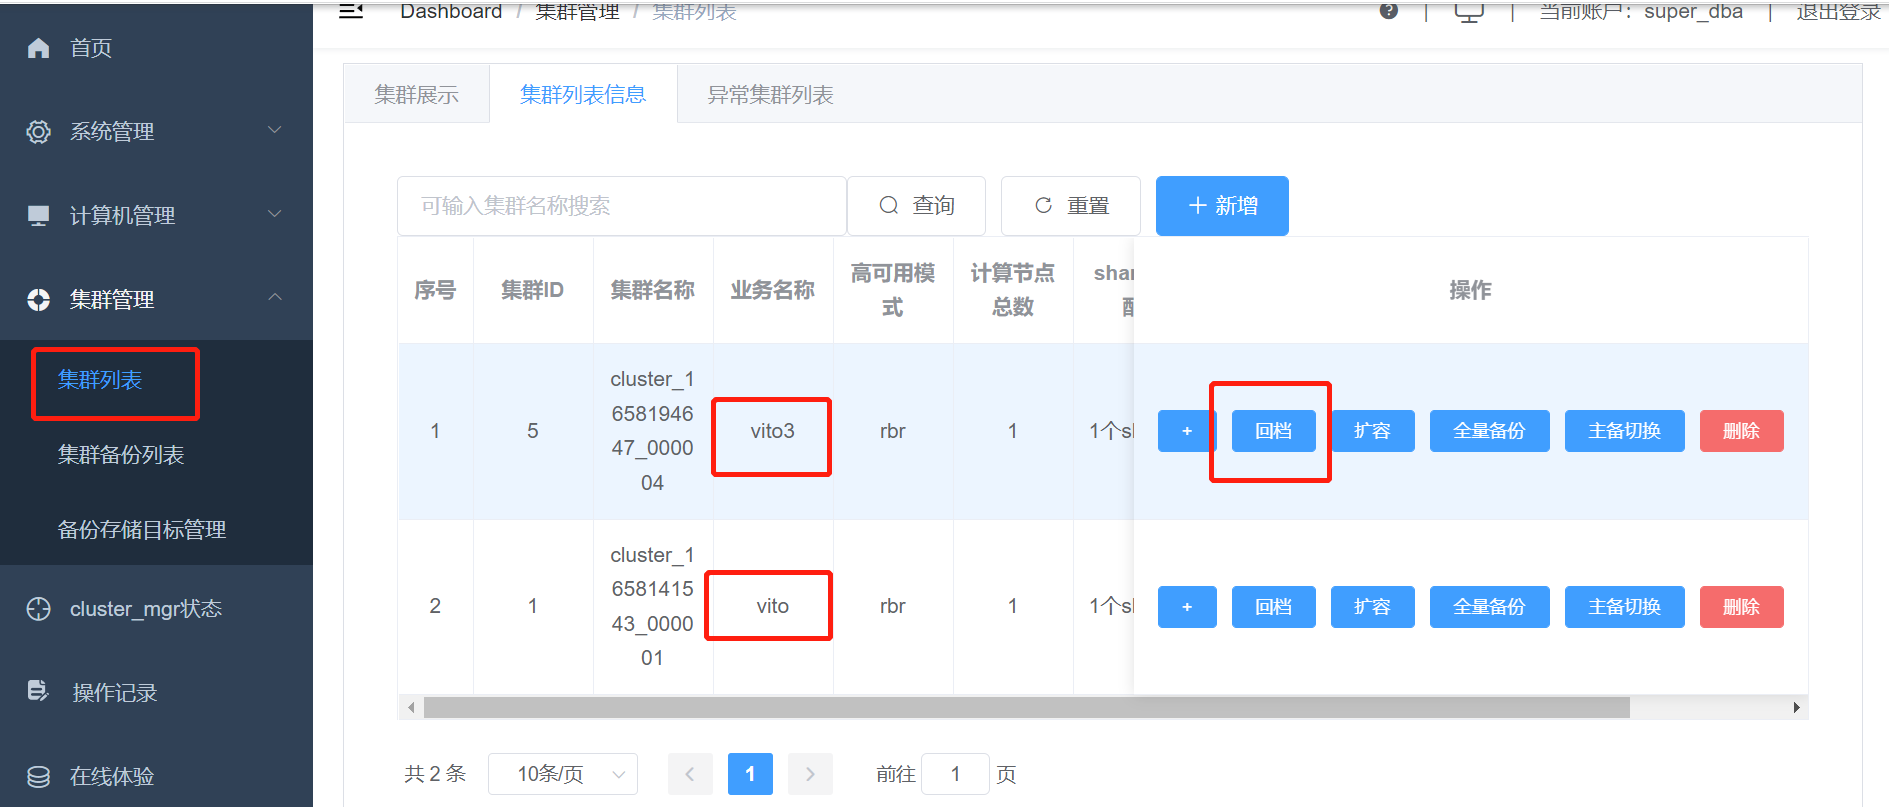
Click rollback to start the restore process. 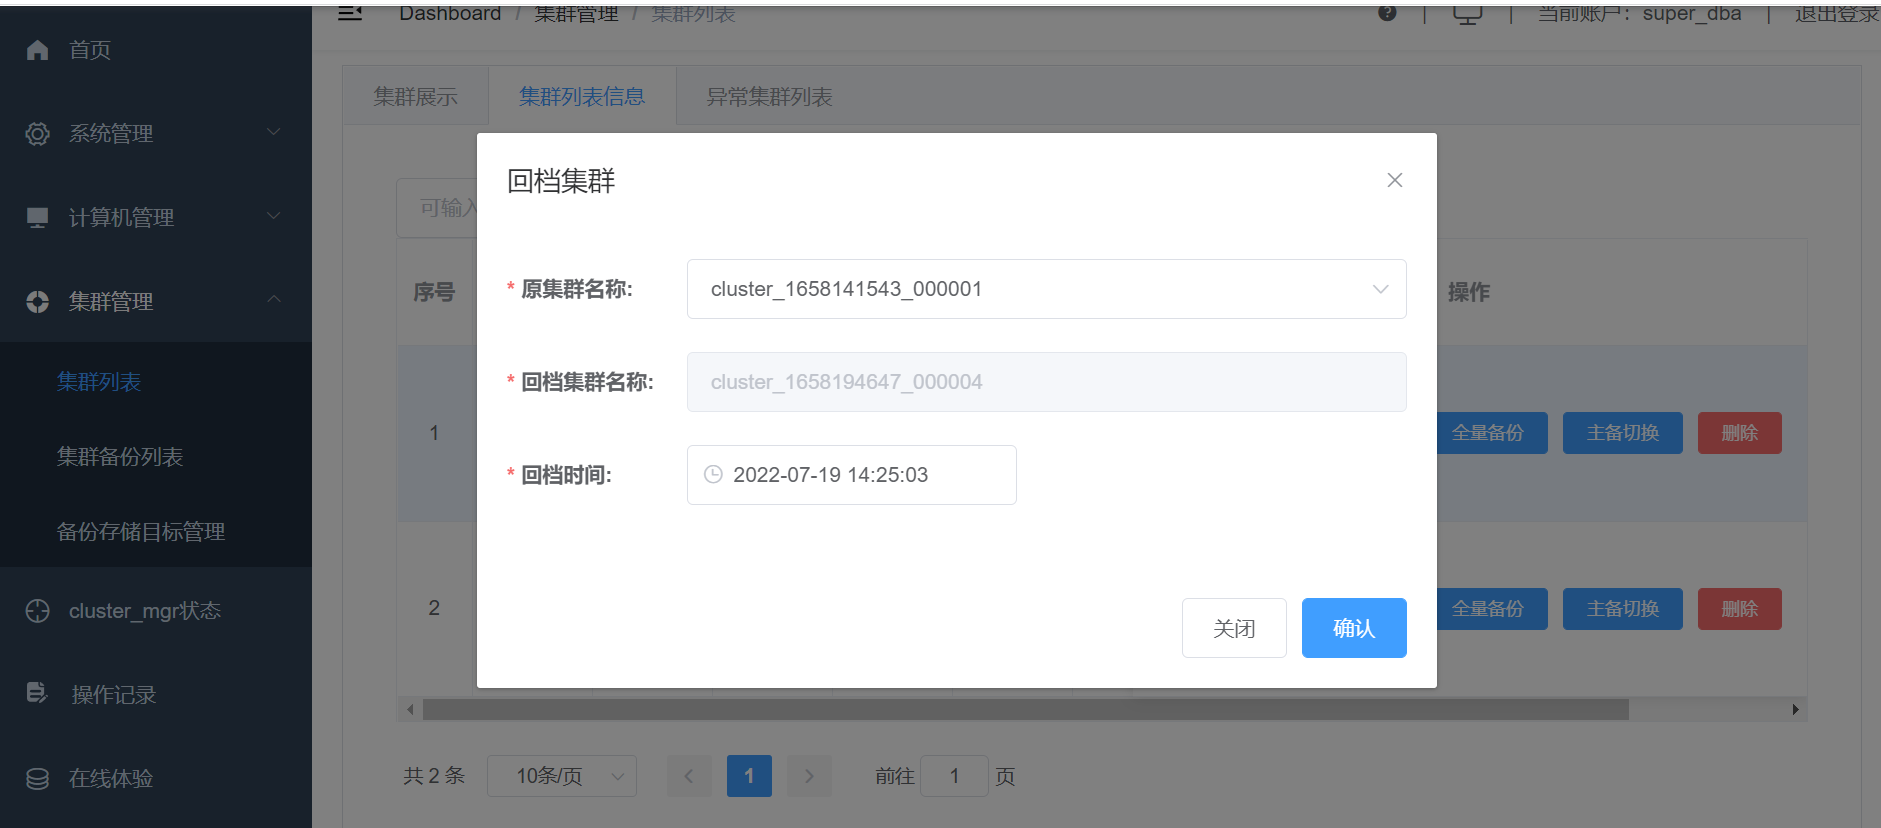
After a successful restore, a prompt saying "Cluster Rollback Successful" will appear. 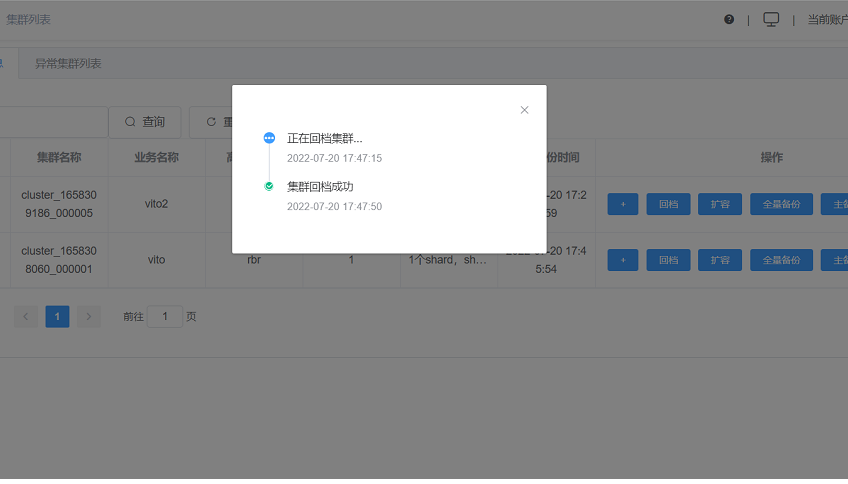
Accessing the vito3 cluster and checking on the computing node 47003, the table in the vito cluster has been successfully rolled back. 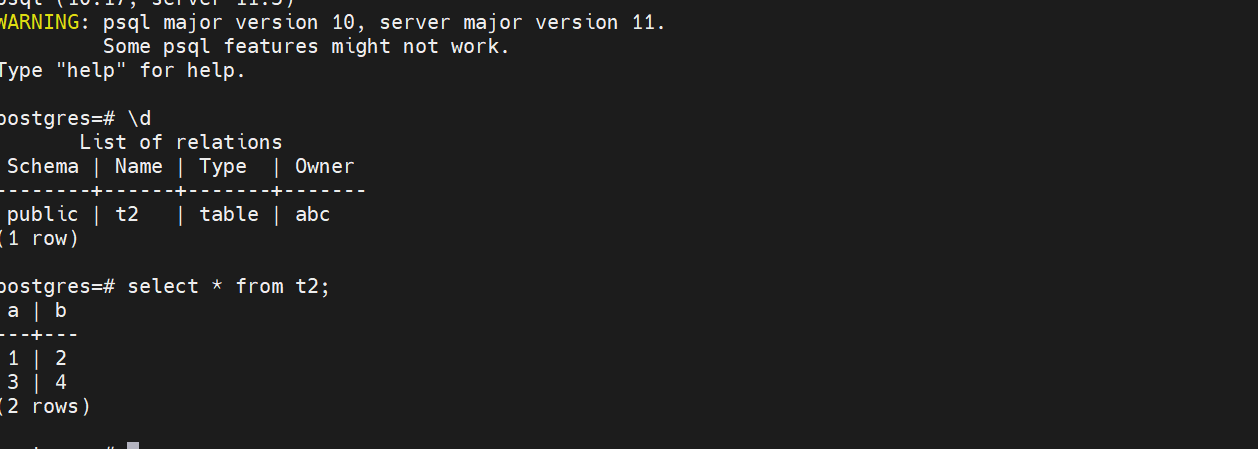
7. Scaling
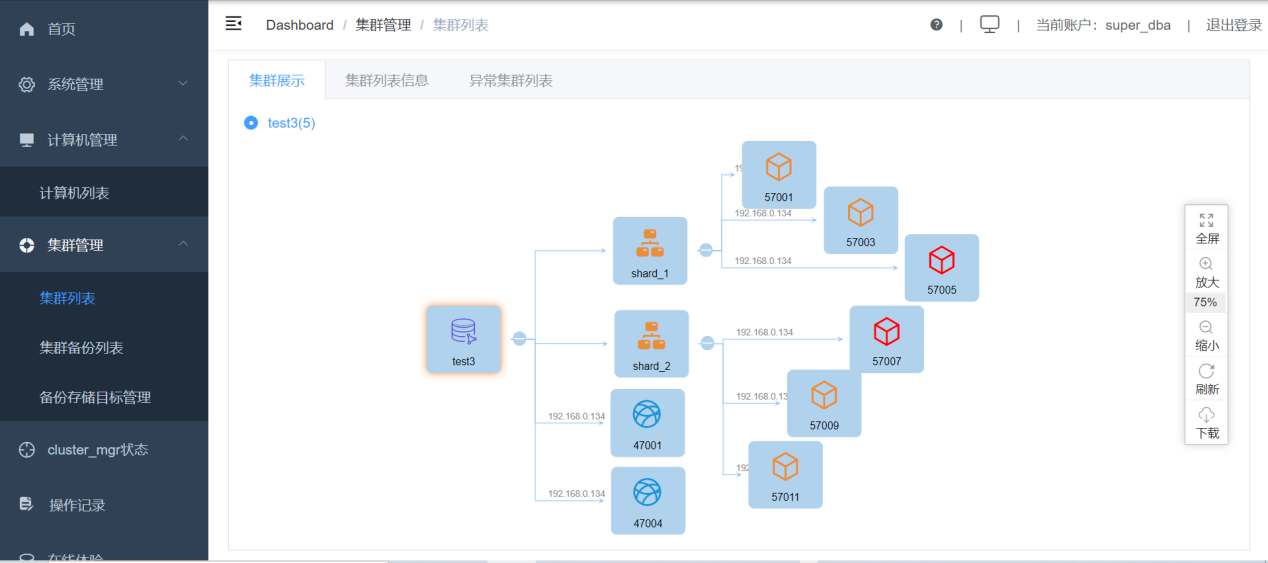
7.1 Currently, a cluster named test3 has been created with two computing nodes 47001 and 47004, and two shards each containing 3 storage nodes (replica number).
7.2 Enter the metadata database kunlun_metadata_db to view the shards.
Select id,name from shards;

Confirm that shard_1 has an ID of 5 and shard_2 has an ID of 7, which will help us place tables on the specified shard.
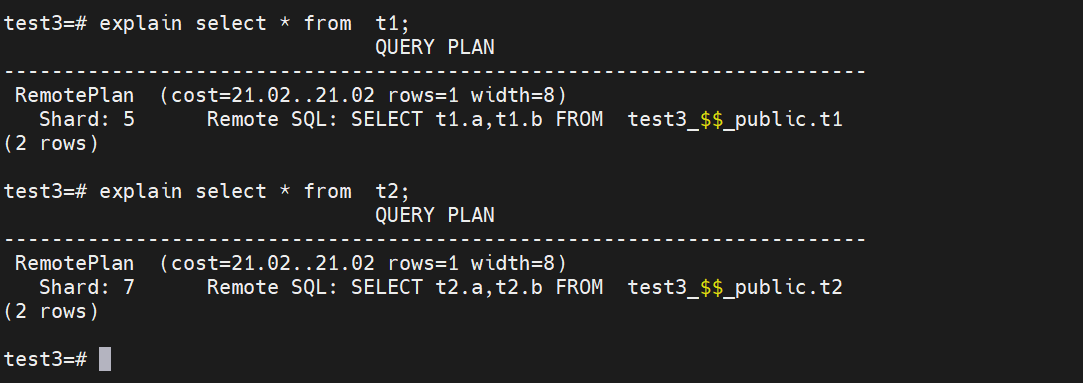
7.3 Enter the computing nodes and store the tables t1 and t2 in shard_1 and shard_2, respectively.
drop table if exists t1,t2;

create table t1(a int, b int) with(shard=5);

create table t2(a int, b int) with(shard=7);

create index on t1(a);

create index on t2(a);
-- Data Preparation
insert into t1 select random()*100, generate_series(1,100) % 10;
insert into t2 select generate_series(1,100), random()*100;
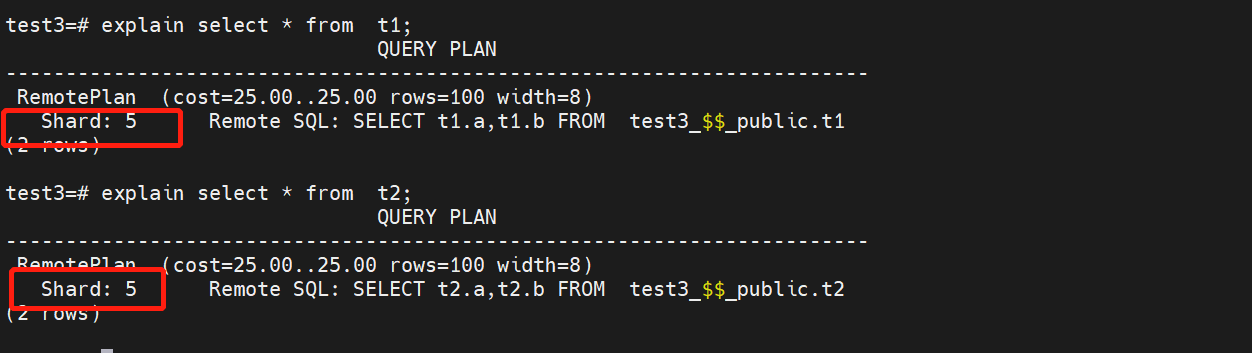
explain select * from t1;
explain select * from t2;
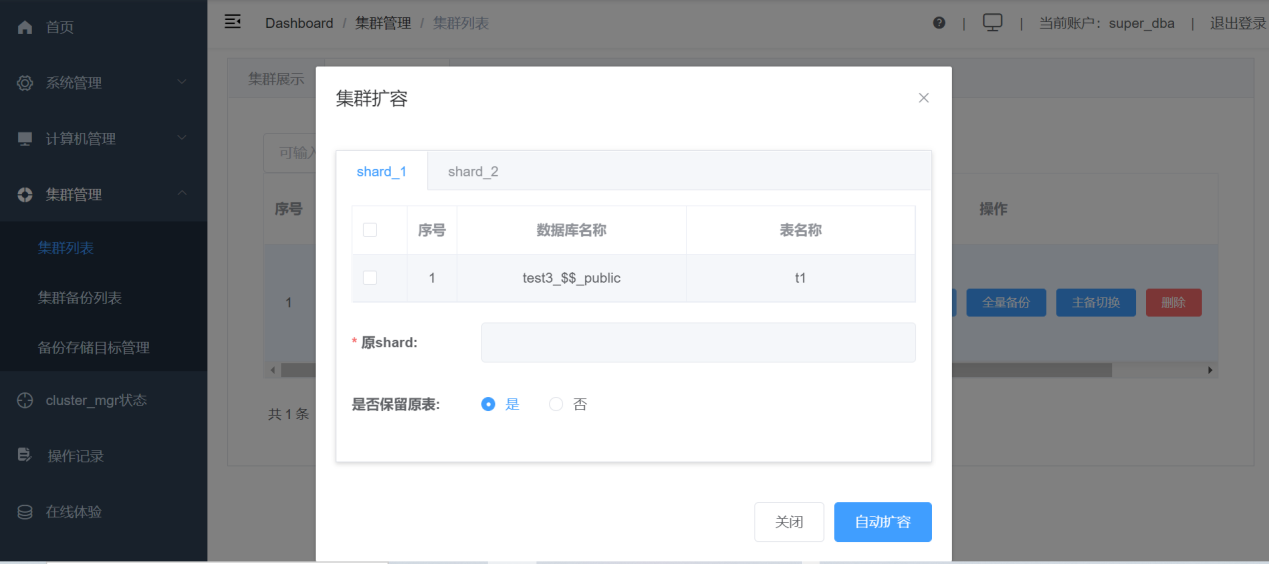
7.4 In XPanel, go to Cluster Management, then to Cluster List, and click "Scaling" to view the status of shards. You can perform scaling as needed. In our case, we have t1 table (ID=5) in shard_1.


7.4.1 Select the t1 table and move it to shard_2.
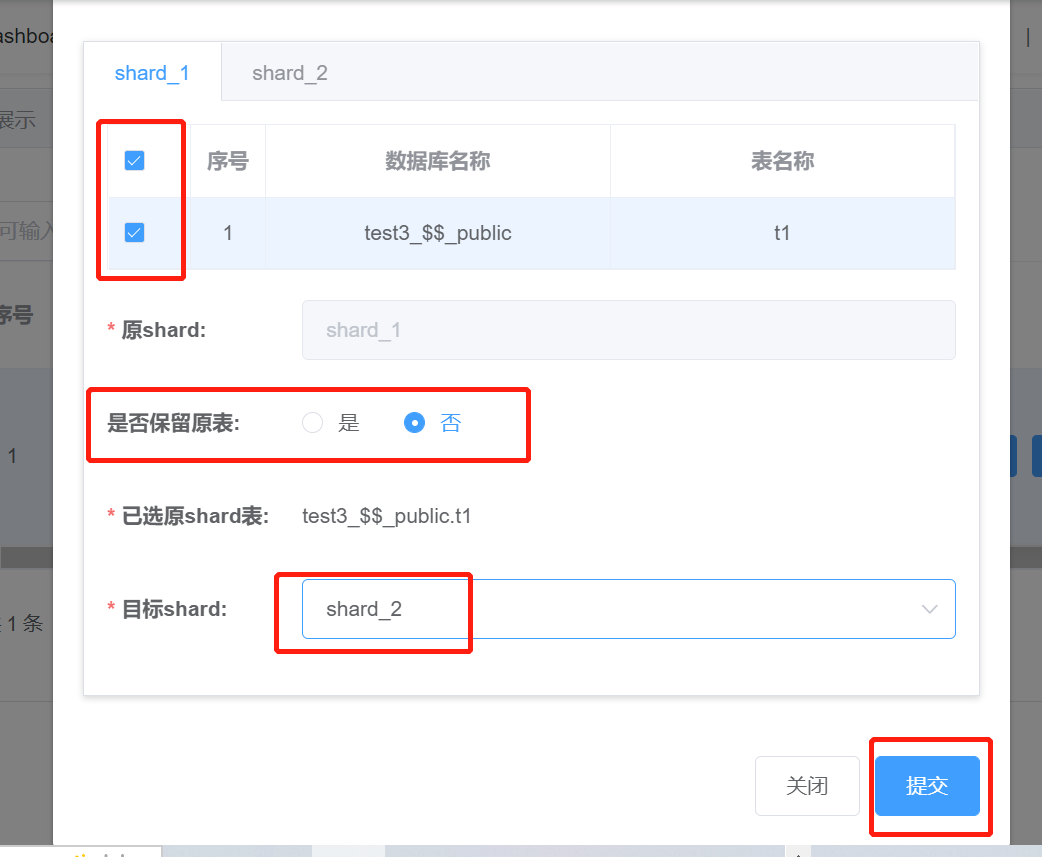
Click "Submit" and confirm the selection.
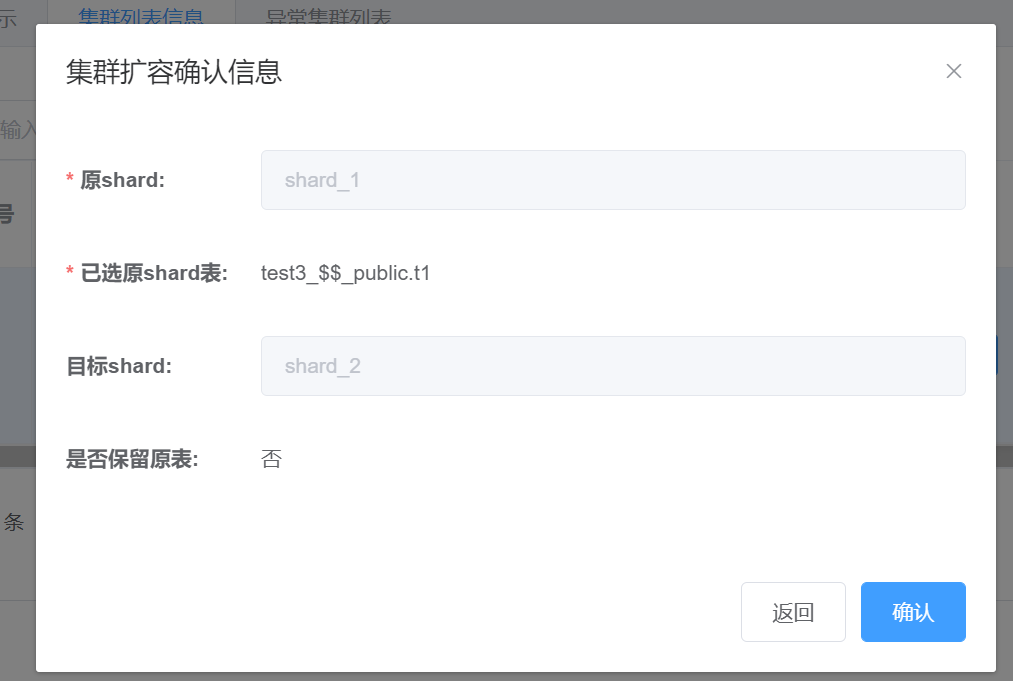
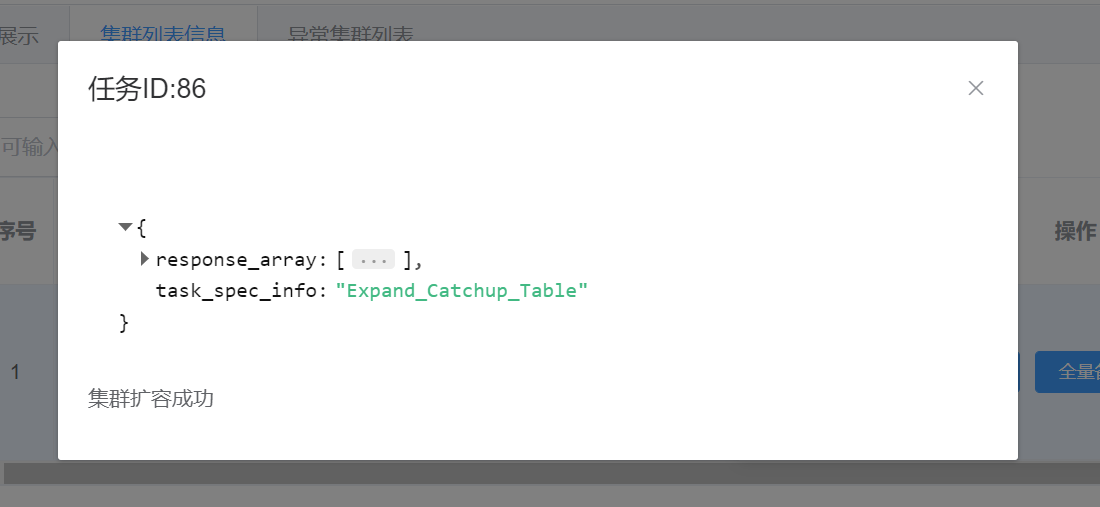
After confirmation, the cluster expansion is successful.
Validate the tables in the computing nodes.
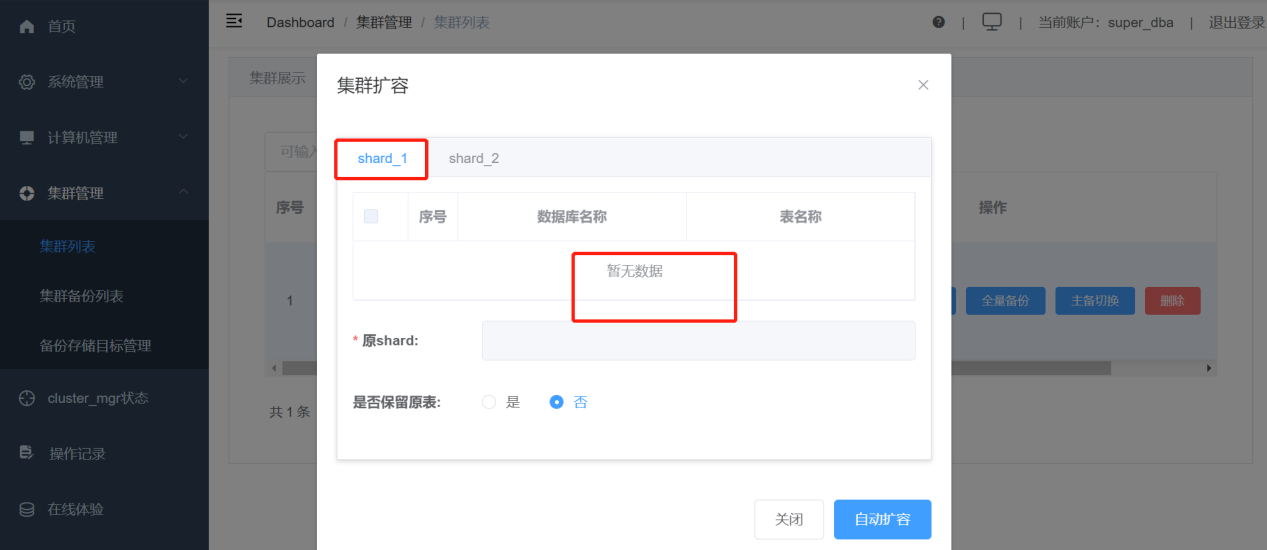
The tables have been successfully moved to shard_2 (ID=7). Go back to XPanel, check the scaling in shard_1, and confirm that there is no data left.
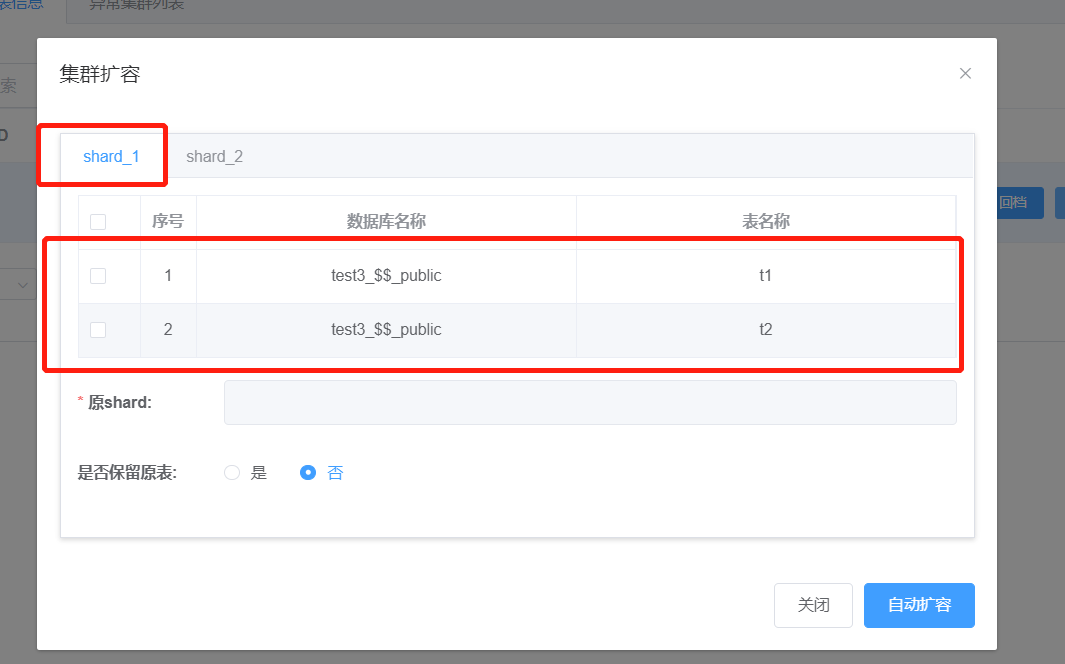
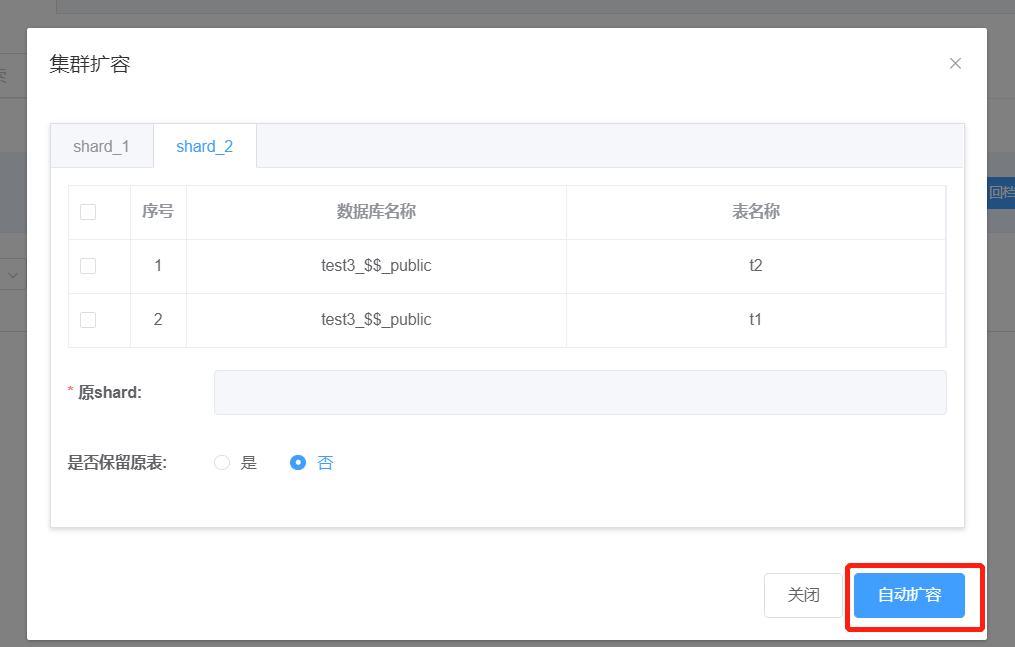
7.4.2 Perform automatic scaling.
Now we will use automatic scaling to move tables from shard_2 to shard_1.
Arrangement options: select "Sort by hotspots" or "Sort by data size".
Click "Automatic Scaling".
Sort the tables in shard_2 by hotspots and scale them to shard_1.
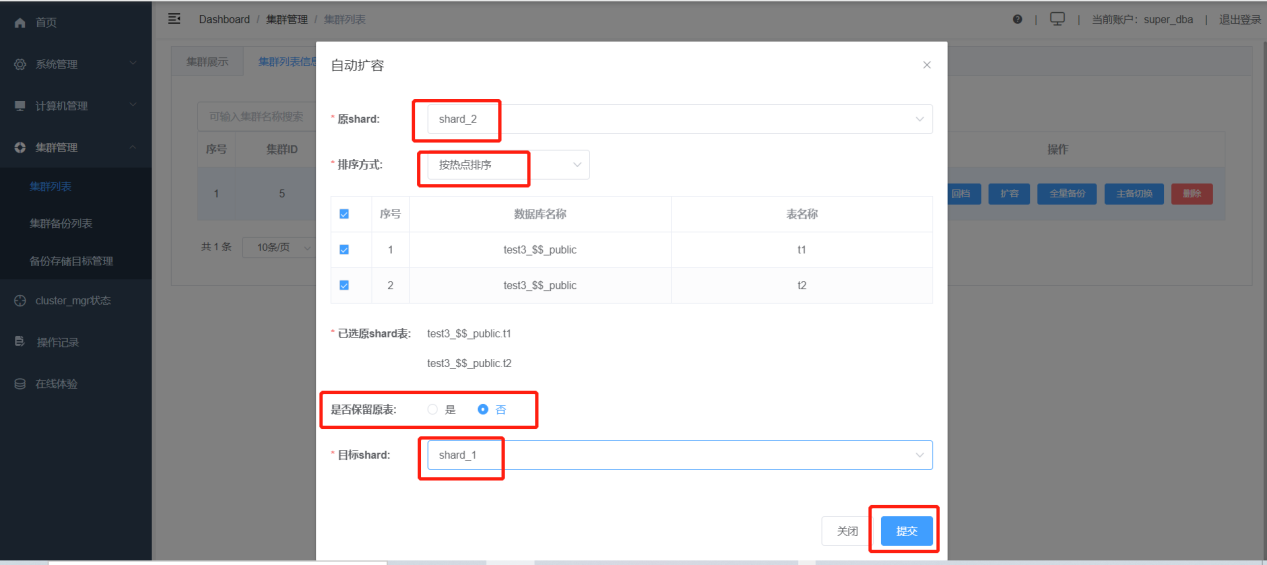
Click "Confirm".
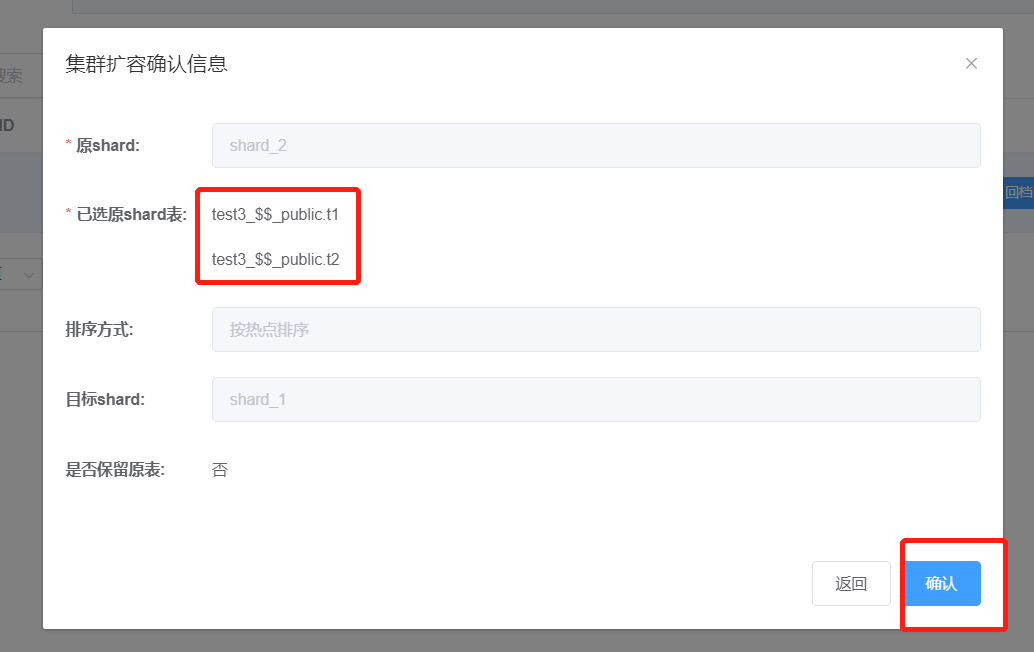
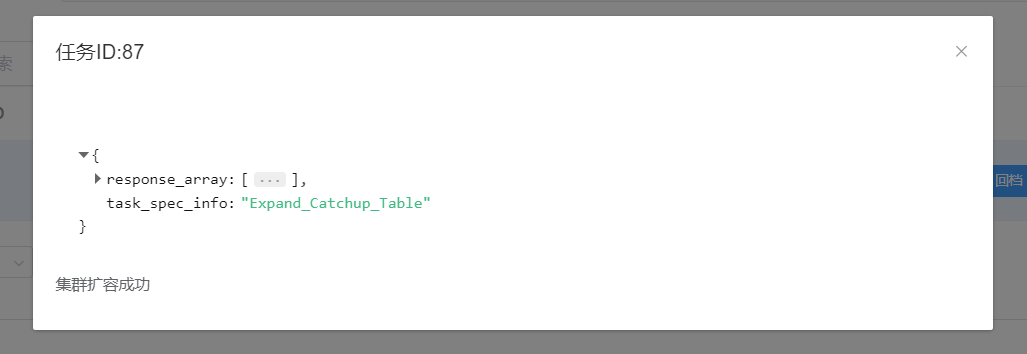
The scaling is complete.
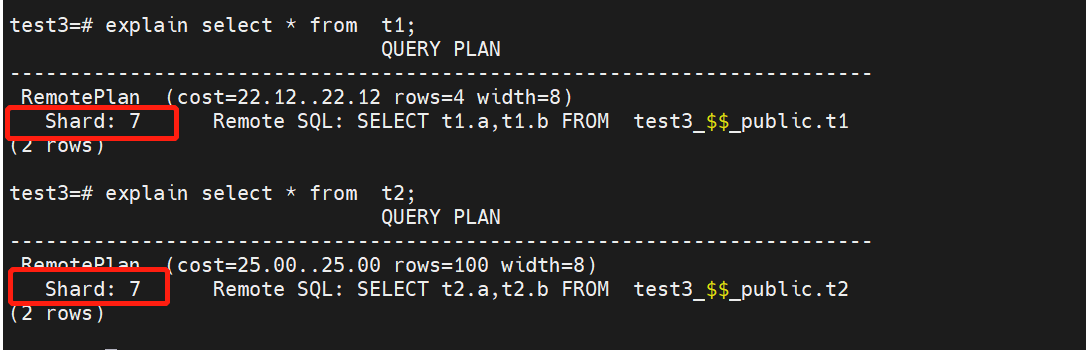
Validate in the computing nodes.
explain select * from t1;

explain select * from t2;
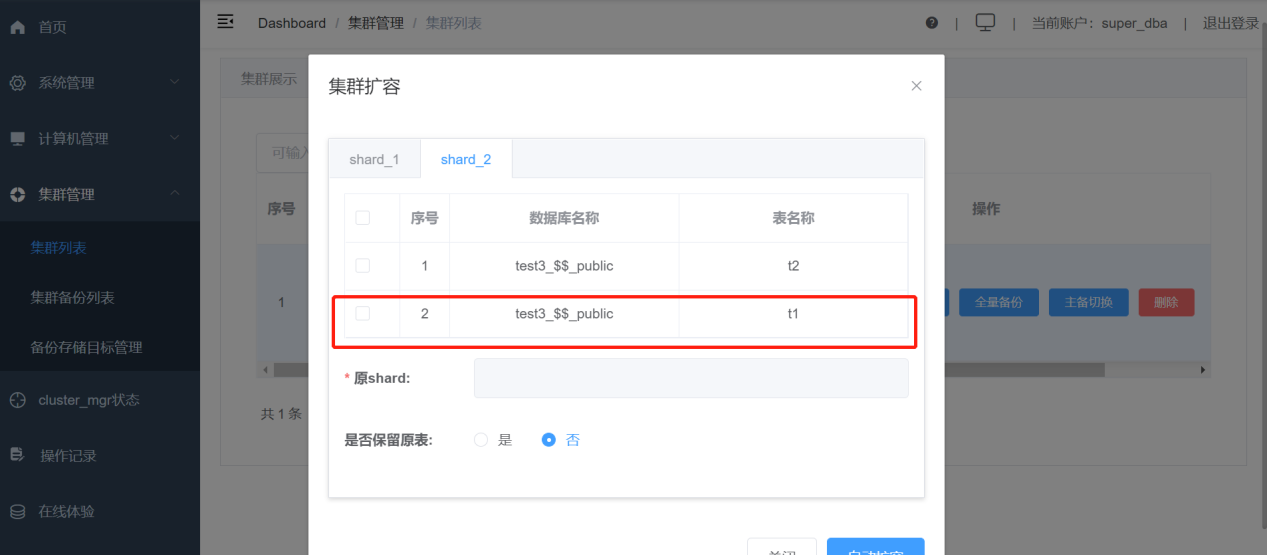
View the t1 and t2 tables in shard_1 in the Xpanel expansion interface.